Step by Step guide to using a pillar drill

Unless you want to look like our friend Jill here, i suggest you follow this step by step guide to safely and correctly using a pillar drill.
Step 1: Before entering the workshop and using any tool or machine, we must take off our blazer and put on our apron. You may look like you are going to cook a pie but it will prevent any unwanted swarf/dust/paint etc attaching itself to your school uniform. This will keep your mum happy as she wont need to stand for hours cleaning polish off your uniform. Remember to put on goggles before using machines.

Step 2: Mark out your work to be drilled. If its wood - use a pencil, if its metal - use a scriber and if its plastic - use a marker.
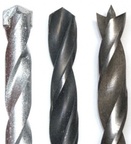
Step 3: Set the drill bit of the correct diameter into the chuck of the pillar drill and tighten it. Make sure the drill bit is straight as it could break easily if its bent.
Step 4: Pull guard across to cover the drill bit. Turn on the light (if there is one) so you can see your work clearer.

Step 5: Adjust your table and lock it. Adjust your locking lever depth so that the desired cut you want will be achieved. Turn on your drill.

Step 6: Move the lever down until the drill touches the work. Go slowly and carefully. When finished. Turn off the machine. The work may need clamped down if it is a small piece of material. Remember: always be aware of where the emergency stop button is.

Below is a link to a video on how to use a pillar drill. Watch this before proceeding.
Enjoy.Explore.Expand.
Enjoy.Explore.Expand.
